|
| |
User Manual for Planter Monitor Beta 2015. |
|
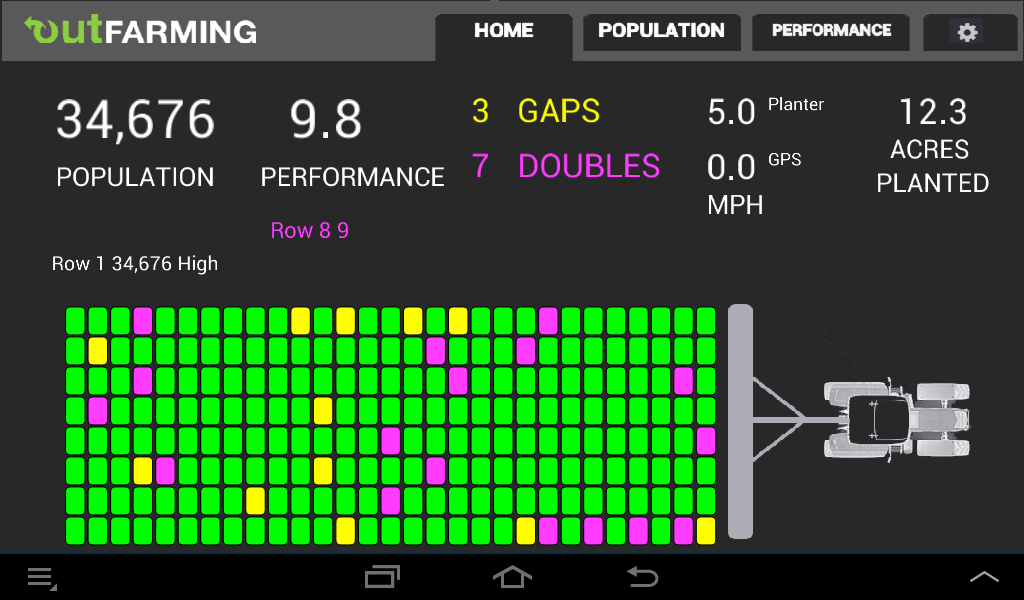
There are 4 tabs across the top of the screen: This is the Home screen. Pressing the other tabs display Population,
Performance, and Set Up screens. Here on the Home screen, Population is in seeds per acre. A performance of 10 is perfect. No gaps or doubles.
Planter speed in MPH is calculated based on how fast the seeds are coming out. MPH based on GPS will display if you go to
settings on the Android device and turn on Location Services, Use GPS satellites. The graphics behind the tractor show what
has happened for the previous 15 seconds. Each box is about 1/2 second that corresponds to about 6 seeds being dropped.
A green box indicates no gaps or doubles. A yellow box indicates a gap occured. A purple box indicates a double where the
seed meter dropped 2 seeds rather than 1. A red box indicates an out of seed condition or blocked seed tube.
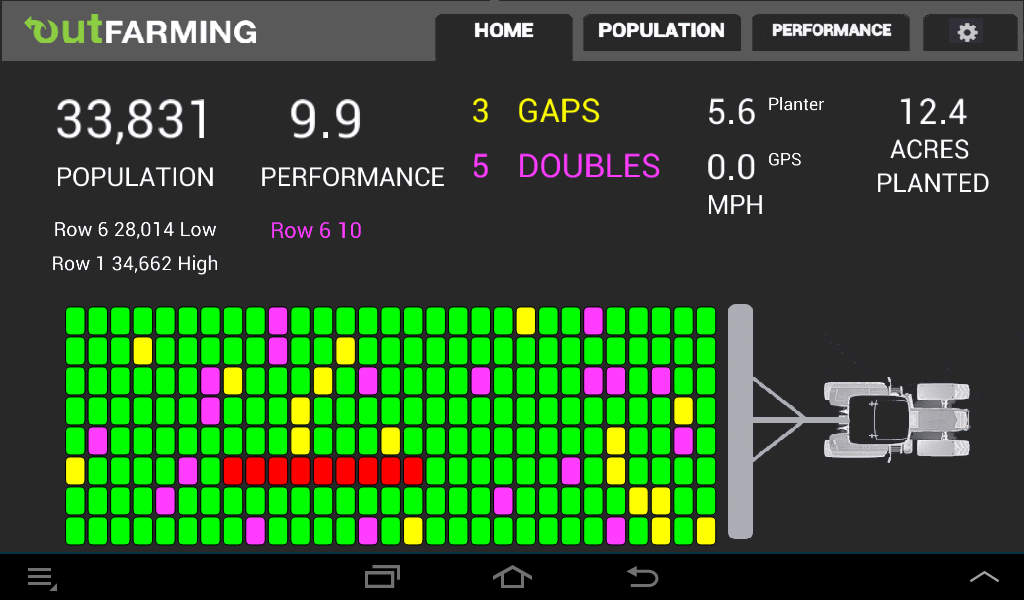 |
Here you see a string of red boxes. That row quit dropping seeds for several seconds. On the setup screen you can
turn on an alarm so there is an audio alert for this.
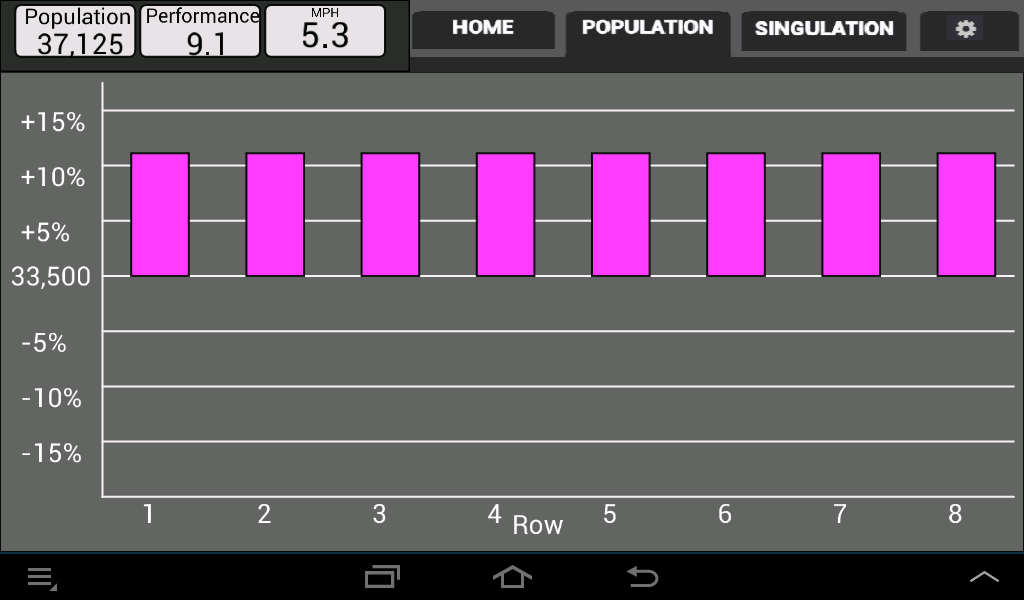 |
The Population screen shows any variation in the population by row. This updates every 5 seconds.
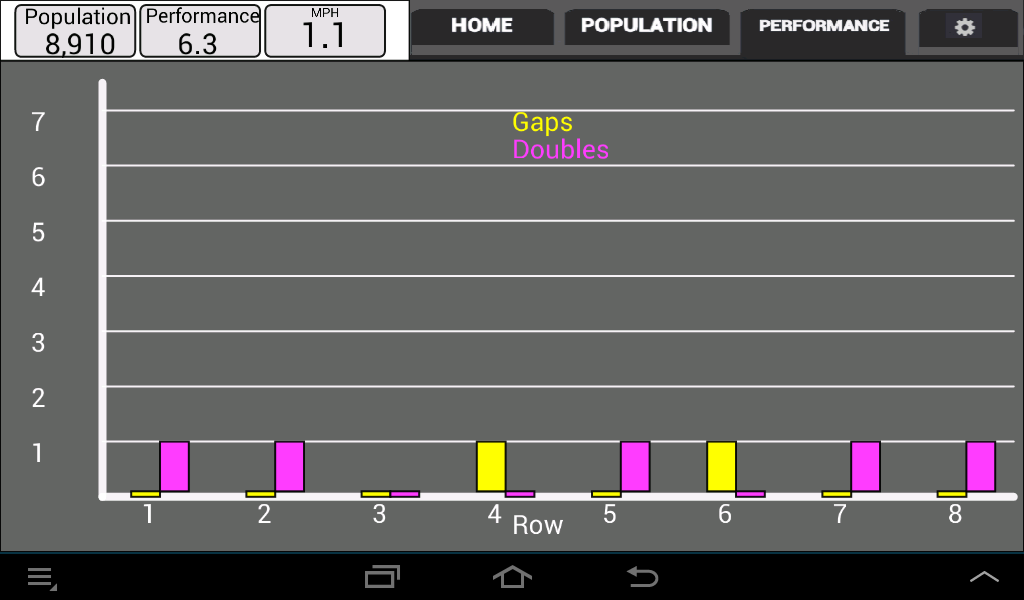 |
The Performance screen shows planting gaps and doubles by row. This updates every 5 seconds.
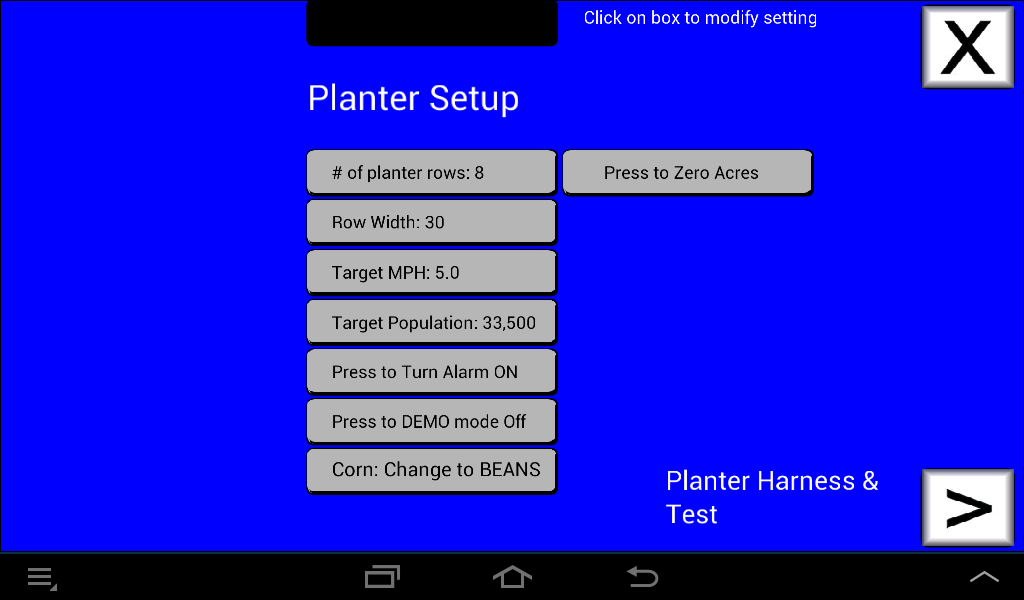 |
The Set Up is used for what you see here: changing the number of rows, row width, etc. Press the buttons to change.
Note about changing the monitor to beans: Beans planted at 140,000 seeds per acre push 85+ seeds down the seed tube per second. That's
one seed every 12 thousandths of a second. Regular seed sensors can't handle more than one seed every 60 thousandths of a second.
Changing the seed type to beans on my monitor makes the monitor ignore doubles and minor skips but shows when the row is blocked
or out of seed before turning on the audible alarm. The seed population is likely to be much lower than actual when running beans (i.e. wrong).
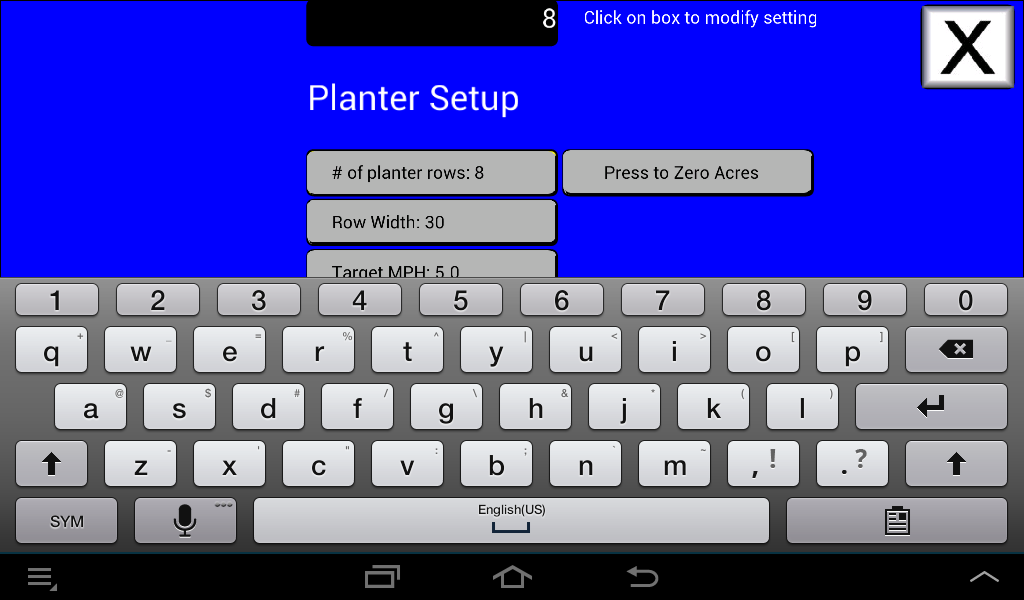 |
Here is an example of pressing the "# of planter rows" button. The current value of "8" appears in the black box at the
top of the screen. The Android keyboard displays at the bottom. Press the BACKSPACE button on the keyboard to
erase the "8" (black box with X near the right top edge of the keyboard). Enter "16".
 |
After entering "16" press the ENTER (also know as return button. Key is on the right side and has an arrow pointing
down and to the left). Upon pressing the ENTER key, the keyboard will disappear. If you press the screen outside of
the keyboard area you it will not change the setting. Look to see if you messed anything up and redo if necessary.
When you are done on the Set Up screen, press the "X" button in the top right.
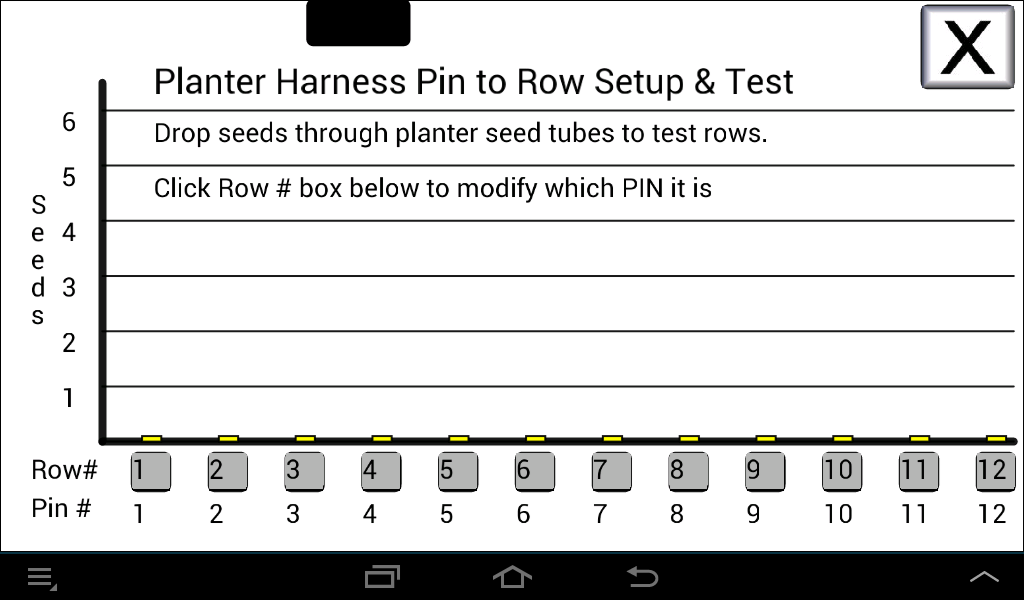 |
Before heading to the field, you will want to test your planter row sensors. On the Set Up Screen, at the right bottom edge
is a button "Planter Harness & Test". With the old monitor on and the control box installed, drop a seed in the row 1 seed tube
(or use your seed tube clean out brush, going up and down). You should see a count of each seed dropped. Go to each
row and verify that your seed sensors are working okay. If you go to this screen while running in the field, it will count and display 500
seeds per row and then reset the counter back to zero.
This screen will also rearrange the order that the rows are displayed. It's only necessary if your wiring harness is wired
wrong. Pin 1 on the harness connector should be row 1, pin 2 - row 2, etc.
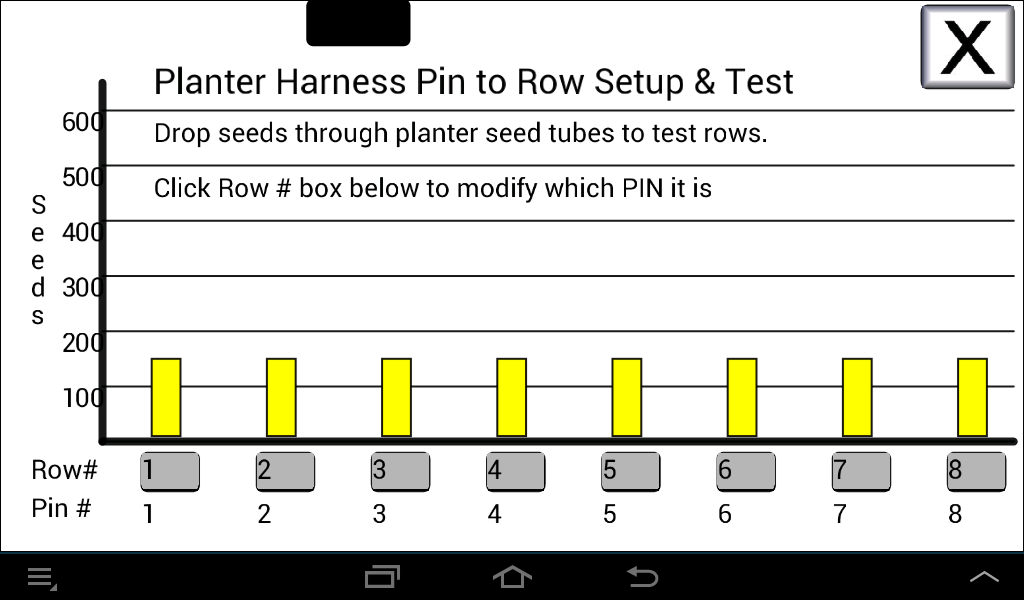 |
Here's the screen as it would appear if you are planting. Instead of counting up to 5 seeds, it displays up to 600 seeds. It
is expected that the seed counts go up at the same rate.