
Seed Meter Testing
If youre a farmer you probably know about some of the recent precision farming improvements to our planters. Farmers are looking at such things as seed placement, singulation, skips, doubles, down pressure, smooth ride, movable trash whips, row shut-offs, variable rate planting, dual variety planting, planting prescriptions, auto-steer, auto-swath. If youre not a farmer, these will mean little to you. I thought you might like to see what can be developed using open source products.
Buiding a test stand
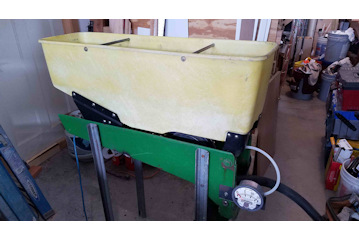
In 2012, I wanted to test my corn planter units to see that they are working properly without paying $30 per row just to have them looked at. Two years before I spent over $800 to have my precision units tested and repairs made. So a trip to Colfax (Iowa) to the local farm implement salvage yard yielded the guts of one row off a John Deere 7000 planter. A couple of days later, legs were added to make it a stand alone test stand. With a trip to the cousins to torch off stuff I didnt need and weld on a bracket for a motor, the thing got motorized. A 107.5 RPM gear motor from www.surpluscenter.com and a new sprocket from John Deere simulates driving the planter at 5 mph. A good spreadsheet and a bunch of math figured out the seeds per second. The test stand senses seed from the meter with a conventional high speed seed sensor (electric eye). I've now found that the old style red LED sensors will work as well. The seed sensor is connected to an Arduino (www.Arduino.cc) board which acts as a digital-to-serial interface. This is connected to a PC via a standard USB port. With programming for the Arduino and the PC you get a test stand that can test for skips, multiple seeds dropped at the same time, singulation, and even problems from individual finger pickups. With seed population displayed its giving the similar information as the expensive stands that implement dealers and precision ag companies have produced.
After I got the test stand working and tested my meters and a few others, I definitely wanted to see if I could modify the program to monitor all eight rows of my planter and run the monitor in the cab while I was planting. That turned out to be more difficult than I thought and I did not get the electronic interface to work by the time I started planting on April 11th. I did get it all together by the 22nd when I planted the remainder of my corn. It definitely helped as I could adjust the brushes on my meters to work best with different size and shape seed. It also showed me problems with two rows that I was able to resolve. The video is quite shakey at first. It was difficult holding my cell phone still while the tractor was bouncing. The display at the bottom is the tractor and planter with seed coming out behind the planter. Yellow squares indicate a skip. Blue squares a double. So you can see my planter has room for improvement.

By Spring of 2014 I switched to an Android tablet mounted in the cab of my tractor with a RAM mount. I had multiple planter problems that plagued me the first three days of corn planting. Even after spring meter testing and planter upgrades, a row sensor failed the first day of planting. The first new row sensor didn't work which lead to further frustrations trying to figure out what was wrong. My planter monitor showed all sorts of skips even though I didn't see them digging in the soil behind the planter. It was extremely dusty. Driving west, I had to stop at the end of the field to let the dust blow by me before I could turn. I was using auto steer to drive straight as I could not see the marker half the time.
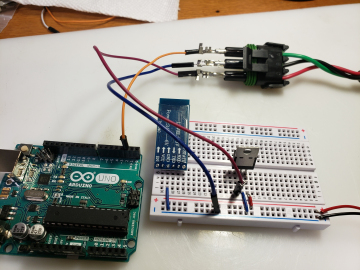
Control box for my planter monitor test stand
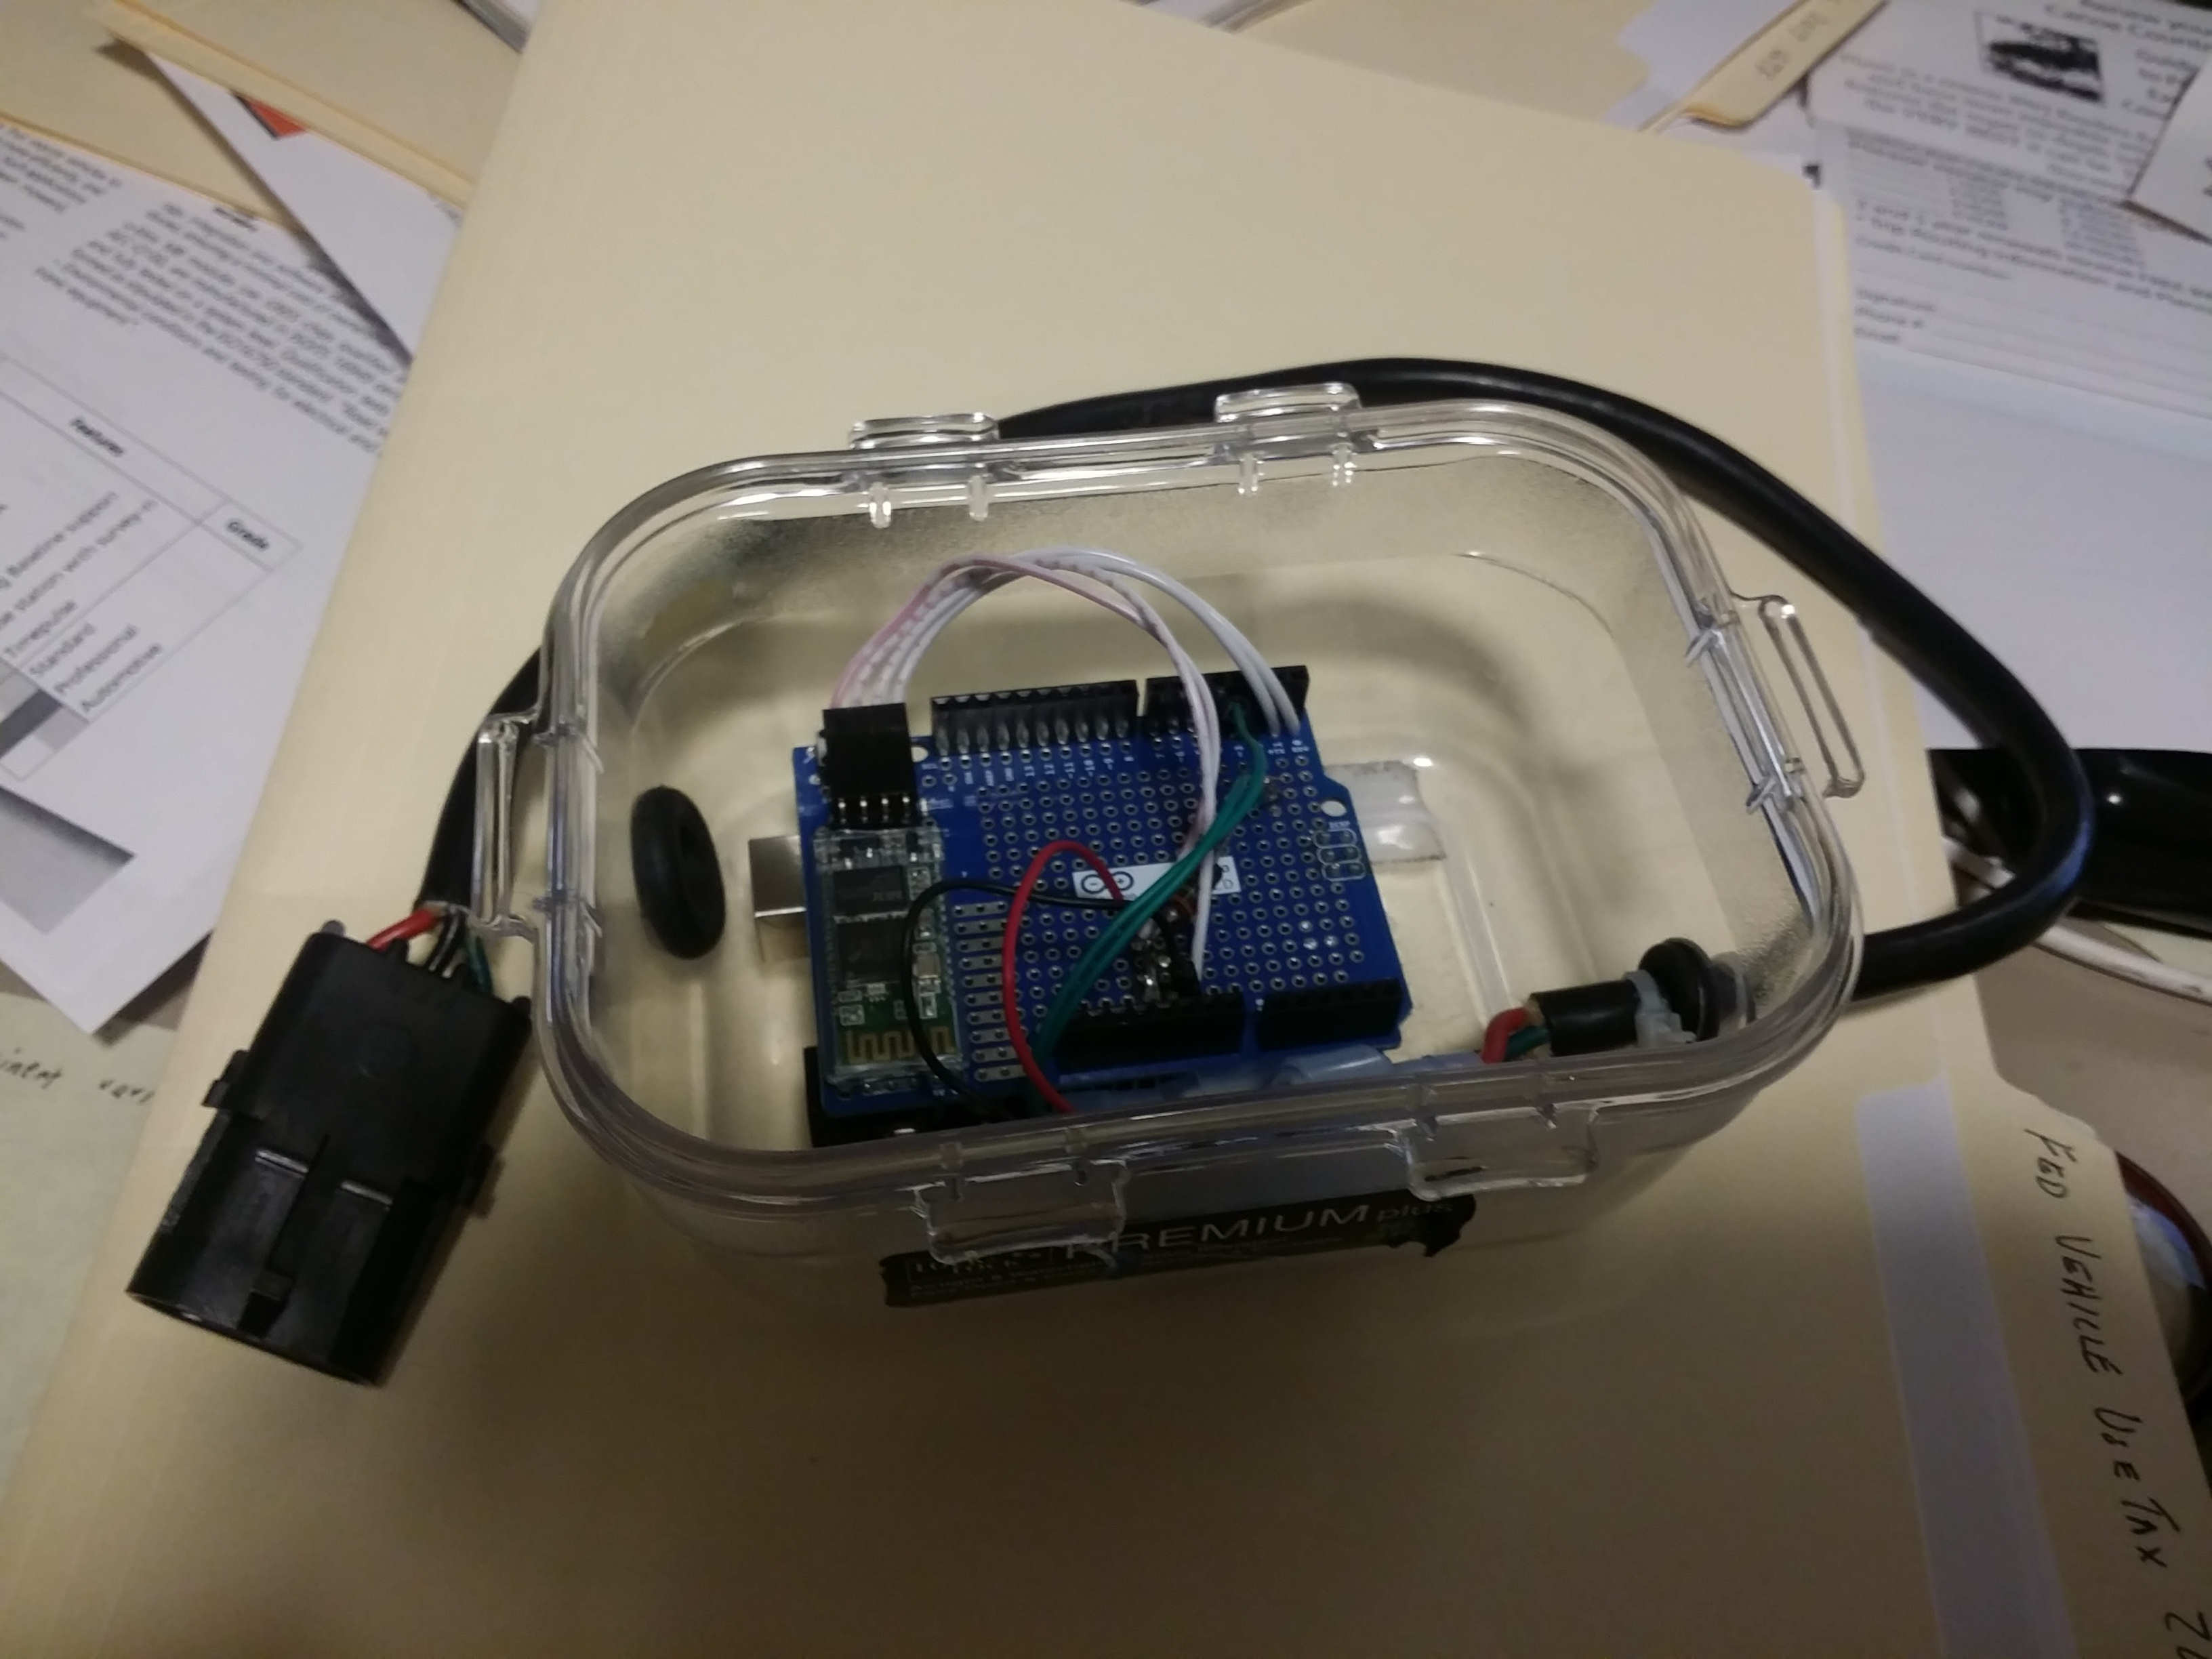

Done on a prototype board
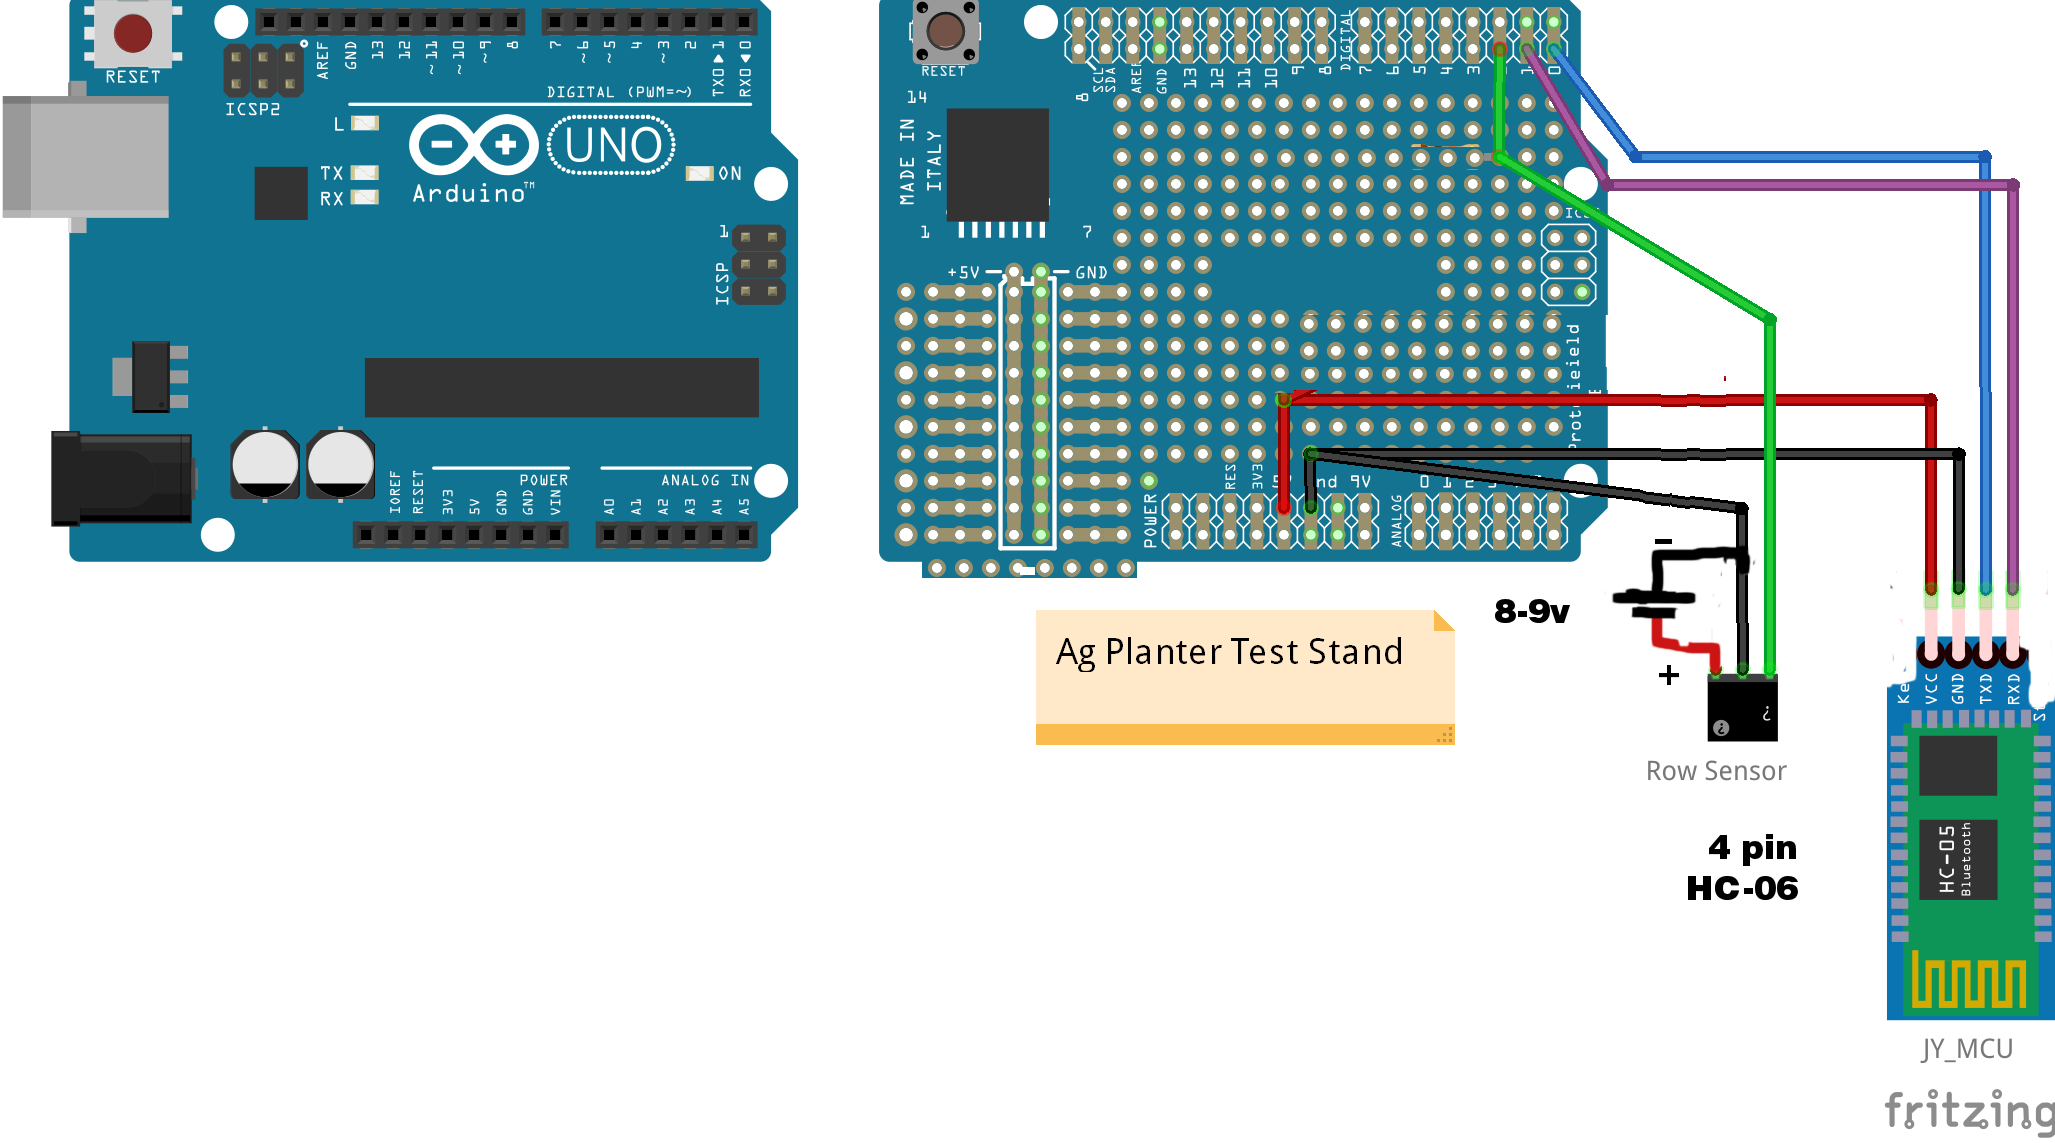
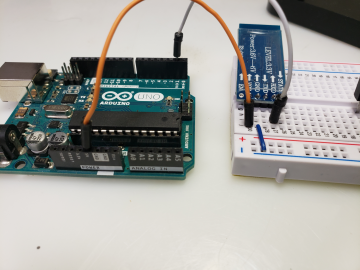
Powering the Uno from the battery.
In real life I use a 12v garden tractor battery.
The seed sensor circuit using an LM7808 power regulator to give the sensor 8V.
Quick source is from digikey.com
The bluetooth connections:
Power comes from 5v pin on Uno to the VCC pin on the bluetooth.
TX from Uno goes to RX on bluetooth.
I've updated the circuit to work for newer high speed tube sensors (April 2021). The high speed sensors need 8v to the red power wire, 5v from the Uno is enough for older sensors. A 9v battery will actually work, or one can buy a cheap voltage source off Amazon or power it from a 12v car/garden tractor battery.
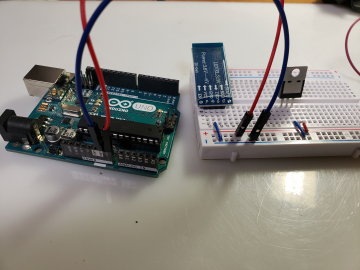
In the first picture the blue board on the left is an Arduino Uno Rev.3. On the right is an Arduino Proto Shield that mounts on top of the Uno with "headers". That is how I built my first one.
The next series of pictures show how you can use a simple prototyping board.
Powering the Uno can be done with 9-12v.
Where I have drawn the row sensor wires, I actually use a piece of cable cut off an old row sensor with a male weather-pack connector added where the row sensor connects. I use the LM7808 power regulator to drop the voltage to the sensor to 8v. See digikey.com
To send the signal to the bluetooth module connect a wire from the Uno's TX pin to the bluetooth RX pin. You don't need both TX and RX. You are just transmitting to the bluetooth.
For initial testing, hook the Uno to a PC via USB cable and take off the Bluetooth module. Use the Arduino serial monitor to view the output.
The Arduino code:
/* Each time the a row's input pin goes from LOW to HIGH (e.g. because of a seed
passing the sensor), the output pin is toggled from LOW to HIGH. There's
a minimum delay between toggles to debounce the circuit (i.e. to ignore
noise).
created 27 April 2013 by modifying the Example / Digital / Debounce
updated 8 April 2021
by James K. Poyzer
*/
long millisAtGPS = 0;
long millisAtFeedback = 0;
String rowinfo = "";
long debounceDelay = 3; // the debounce time; increase if the output flickers
int systemResetDelay = 1000;
int reading = 0;
int takeAction = 0;
int sensorState = 0;
int newSensorState = 0;
int lastSensorState = 0;
long lastDebounceTime = 0;
long millisAtLastSeed = 0;
int millisSinceLastSeed = 0;
long seedGap = 0;
//*******************************************************************
void setup() {
Serial.begin(9600); // !! must match blue tooth setting!! Initialize serial communications on serial port
Serial.println("Uno_TestStand_4_8_21");
pinMode(2, INPUT_PULLUP); //keeps the sensor signal high until seed drops the signal to low
lastDebounceTime = 0;
millisAtLastSeed = millis();
digitalWrite(2, HIGH);
delay (systemResetDelay);
} //void setup
void loop() {
if ((millis() - lastDebounceTime) > debounceDelay) {
// don't take a reading everytime, wait for
// the delay time before checking to see if something
// changed
takeAction = 1;
} // delayed long enough for reading to be stable
if (takeAction == 1) {
reading = digitalRead(2); // read will be high or low (1 or 0)
if (reading != lastSensorState) { // not equal
newSensorState = reading;
if (newSensorState == LOW) {
// okay to write record
seedGap = (millis() - millisAtLastSeed);
rowinfo = ("R01");
if (seedGap < 10) {
rowinfo = rowinfo + "0";
}
if (seedGap < 100) {
rowinfo = rowinfo + "0";
}
if (seedGap > 999) {
seedGap = 999;
}
rowinfo = rowinfo + String(seedGap) + "X";
Serial.println(rowinfo); // output looks like "R01057X" row 1 with 57 milliseconds between seeds
takeAction = 0; // delay next time it comes to this row
millisAtLastSeed = millis(); //to be used when next seed comes
lastDebounceTime = millis(); // for delaying next look
} // sensorState = LOW
lastSensorState = reading;
} // reading != old one
} // end where takeAction was 1
if ((millis() - millisAtFeedback) > 3000) {
millisAtFeedback = millis();
Serial.println("Hi"); // to let the app know it's connected, even though no sensor data is coming
}
} // end of void loop
Click the tiny button below to download the test stand app!
You may need to turn on permissions for the Test_Stand_8 app to run.
You will need to pair your bluetooth device to the tablet/phone you are using and then tell the app what the name of the bluetooth device is by going into the test stand settings area.
When you have the test stand running with seeds coming out, look at the large Population window at the TOP LEFT of the app and then look at the Population setting on the BOTTOM LEFT. Adjust the population settings at the bottom to be fairly close to the actual population above by pressing the "Target Population + 200" button or the "Target Population - 200" button. That makes it so the app can figure out what a skip or double is.
When you have run 1000 seeds through the test stand, the app will create a "report" in your Documents area (Use the My Files icon). I'm not sure the report works because I updated the app 1/23/2023.